How Do You Anchor a Solar Panel to the Ground?

As solar energy continues to grow in popularity, ground-mounted solar systems are becoming a preferred choice for homeowners, businesses, and utility-scale projects. Properly anchoring solar panels to the ground is essential to ensure system stability, durability, and efficiency. In this guide, we’ll explore the different methods used to anchor solar panels securely to the ground and the key factors to consider when choosing the best solar panel mounting solution.


1. Understanding Ground-Mounted Solar Systems

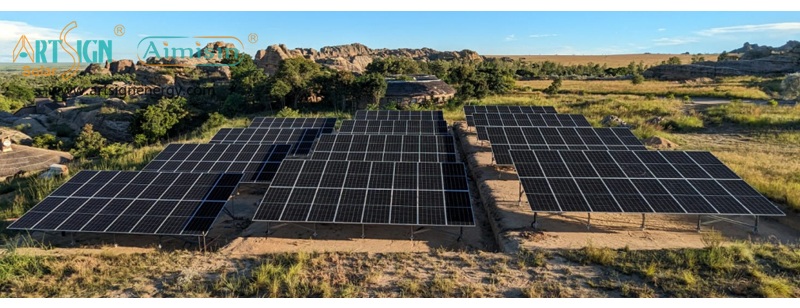
Unlike rooftop solar systems, ground-mounted solar panels are installed on open land, making them more flexible in terms of positioning and angle adjustments. They are ideal for large-scale solar farms, residential backyards, or commercial applications where roof space is limited.

To ensure a stable and long-lasting installation, it’s crucial to choose the right anchoring method based on soil type, climate conditions, and project scale.

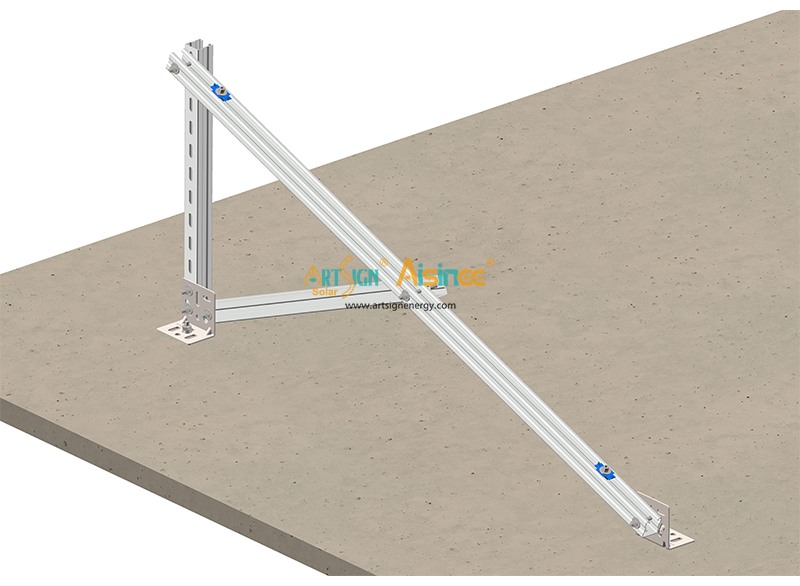
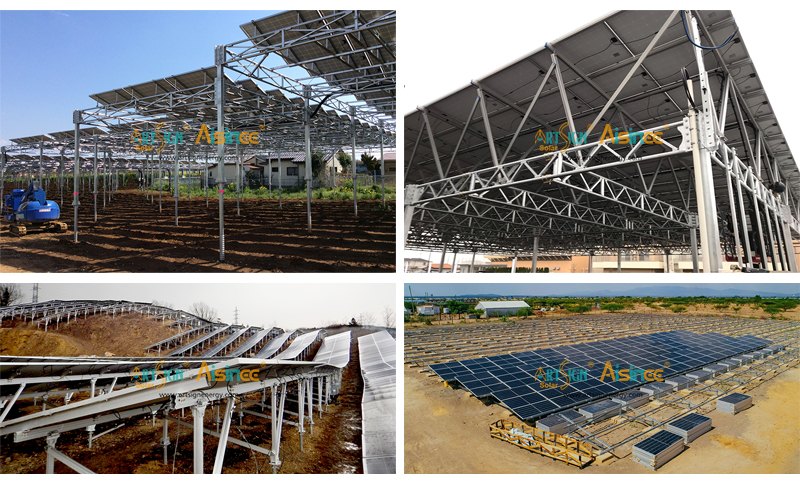
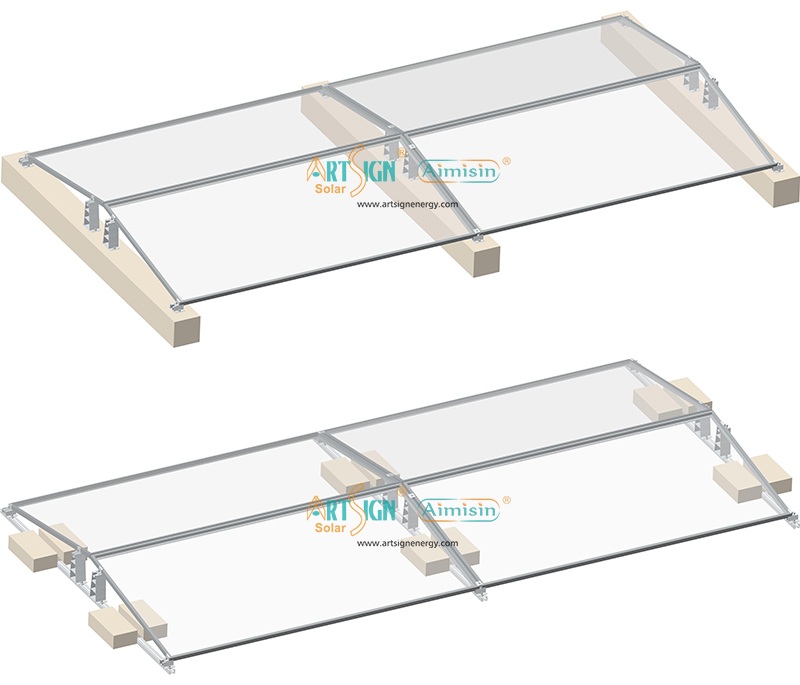
 pv mounting structure with ground screw


2. Common Methods to Anchor Solar Panels to the Ground

A. Ground Screws

Ground screws are an efficient and widely used anchoring method for solar panel installations. These large, threaded steel rods are drilled into the ground to provide a strong foundation for the pv mounting structure.

Best for: Soft soil, sand, and areas with minimal rock content
Advantages:

· Fast installation without concrete

· Reusable and environmentally friendly

· Suitable for temporary and permanent installations


B. Concrete Foundations

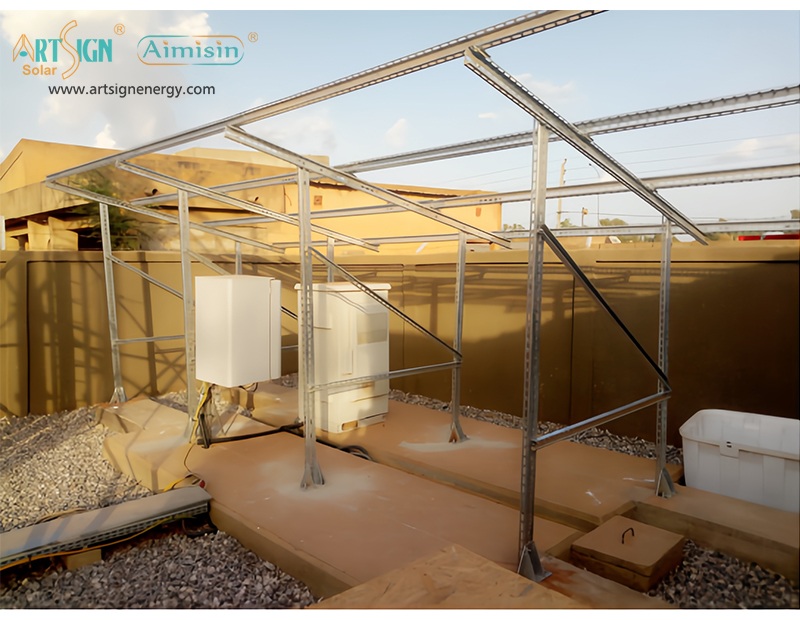
Concrete footings offer the most secure anchoring for ground-mounted solar panels, providing stability in challenging environments. This method involves digging holes, placing support posts, and pouring concrete for a rock-solid foundation.

Best for: Rocky, uneven terrain, and areas with high wind loads
Advantages:

· Long-lasting and durable

· Withstands extreme weather conditions

· Ideal for utility-scale projects

C. Driven Piles

Driven piles involve hammering steel or aluminum posts deep into the ground to create a sturdy base for the solar mounting system. This technique is commonly used in large-scale solar farms.

Best for: Hard soil, clay, and commercial solar projects
Advantages:

· Quick installation with heavy machinery

· No need for concrete

· Strong resistance to uplift forces

D. Ballasted Mounts

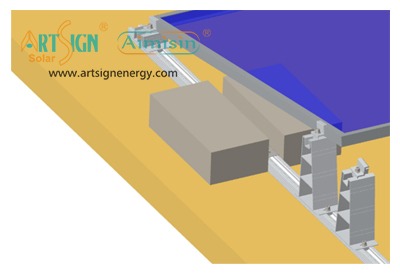
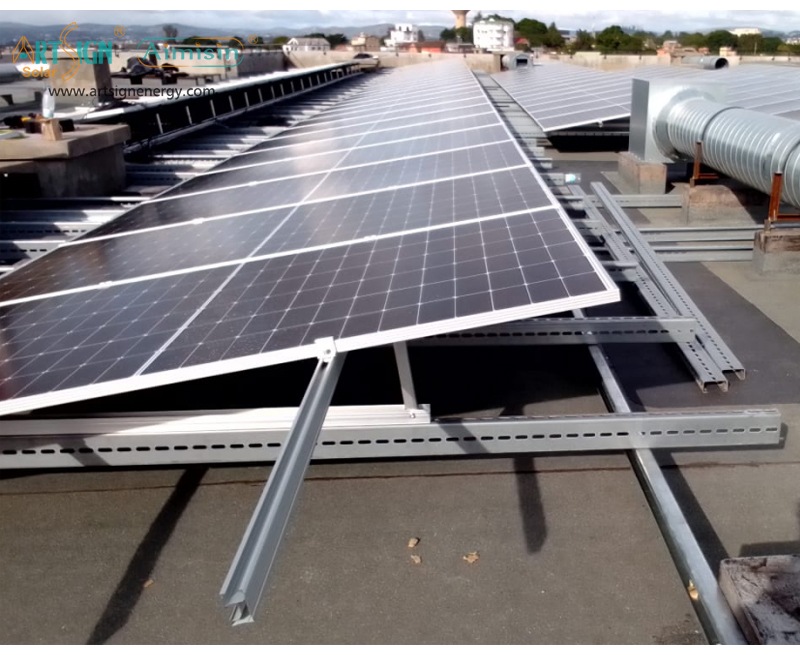
Ballasted solar mounting systems use heavy concrete blocks to secure solar panels without penetrating the ground. This method is ideal for locations where digging is not an option, such as landfills or leased properties.

Best for: Sites with excavation restrictions, unstable soil
Advantages:

· Non-invasive and easy to remove

· No drilling or ground penetration required

· Ideal for temporary installations

 best solar panel mounting solution


3. Factors to Consider When Choosing an Anchoring Method

When deciding on the best anchoring solution for your ground-mounted solar panels, consider the following factors:

Soil Type: Sandy soil may require ground screws, while rocky terrain is better suited for concrete foundations.
Wind & Snow Load: High-wind areas need reinforced anchoring, such as driven piles or concrete bases.
Installation Speed: Some methods, like ground screws, allow for faster installation without waiting for concrete curing.
Project Budget: Concrete foundations are durable but costly, while ballasted systems provide a budget-friendly alternative.
Environmental Impact: Reusable and non-invasive methods, such as ground screws and ballasts, are more eco-friendly.


Anchoring solar panels to the ground is a crucial step in ensuring a stable and long-lasting solar installation. Whether using ground screws, concrete foundations, driven piles, or ballasted mounts, the right method depends on soil conditions, weather factors, and budget considerations. By choosing the most suitable anchoring solution, you can maximize the efficiency and lifespan of your solar energy system.

How Do You Attach Solar Panels to a Roof Without Drilling?

As solar energy adoption grows worldwide, many homeowners and businesses seek ways to install solar panels without drilling into their roofs. While traditional solar panel mounting systems rely on penetrative methods, there are non-invasive alternatives that offer secure attachment without compromising the integrity of the roofing structure.

In this guide, we will explore various drill-free solar panel installation methods, their advantages, installation processes, and factors to consider when choosing the right system.


Non-penetrating solar mounting solutions


Why Avoid Drilling When Installing Solar Panels?

Drilling into a roof can raise several concerns, including:

· Water Leakage Risks: Improperly sealed holes can lead to long-term water damage.

· Roof Warranty Voiding: Some roofing materials and manufacturers prohibit penetrations that could void warranties.

· Structural Integrity Issues: Drilling can weaken certain roof types, such as metal or tile roofs, leading to potential structural vulnerabilities.

· Complex Installation Requirements: Drilling requires precise alignment with rafters and additional waterproofing measures.

To address these challenges, solar mounting innovations have introduced non-penetrative solutions that ensure secure installations while preserving the roof’s condition.


Non-Drilling Solar Panel Mounting Solutions

1. Ballasted Solar Mounting Systems

How It Works:
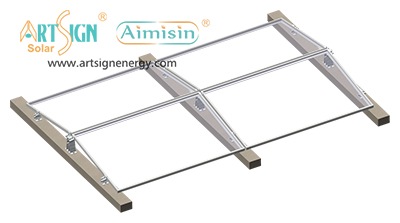
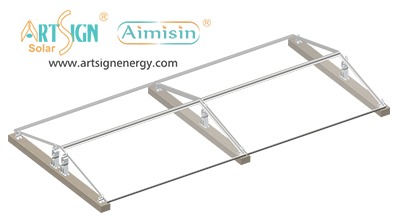
Ballasted solar systems use weighted mounting structures to secure solar panels in place without requiring roof penetrations. The system relies on concrete blocks or metal ballast trays to provide stability.

Best for:

· Flat roofs (commercial or residential buildings)

· Roofs with adequate load-bearing capacity

Installation Process:

1. Assess Roof Load Capacity: Ensure the roof can support the weight of the ballasts.

2. Lay Out Ballast Blocks: Distribute weight evenly across the installation area.

3. Position Solar Panel Racking: Secure racking structures with ballast trays.

4. Mount Solar Panels: Attach panels to the ballast system using clamps.

Advantages:

· No roof penetration required

· Suitable for large-scale installations

· Easy to remove or relocate panels

Considerations:

· Requires strong roof load capacity

· High winds may necessitate additional anchoring

Ballasted Solar Mounting Systems 


2. Adhesive-Based Solar Mounting Systems

How It Works:
Adhesive-based solar mounting systems use high-strength industrial adhesives or tapes to attach mounting brackets directly onto the roof surface. These adhesives are designed to withstand environmental conditions and provide long-term bonding.

Best for:

· Metal roofs and flat roofs

· Lightweight solar panels (flexible solar panels)

Installation Process:

1. Prepare the Roof Surface: Clean and dry the installation area.

2. Apply Industrial Adhesive: Use manufacturer-approved adhesive for secure bonding.

3. Attach Solar Mounts: Press mounting brackets firmly onto the adhesive layer.

4. Cure Time: Allow adhesive to cure as per manufacturer guidelines.

5. Install Solar Panels: Secure panels to the mounted brackets.

Advantages:

· Simple, quick installation process

· No impact on roof integrity

· Ideal for lightweight solar applications

Considerations:

· Requires proper surface preparation

· May not be suitable for heavy solar panels

· Adhesive durability varies based on climate conditions


3. Standing Seam Clamps for Metal Roofs

How It Works:
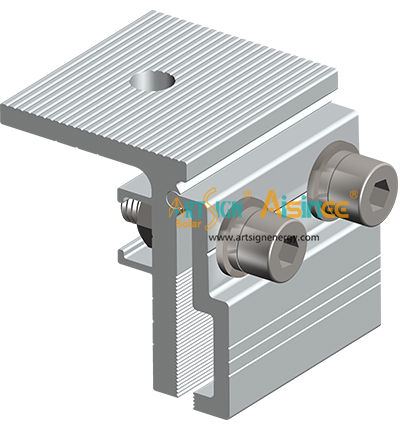
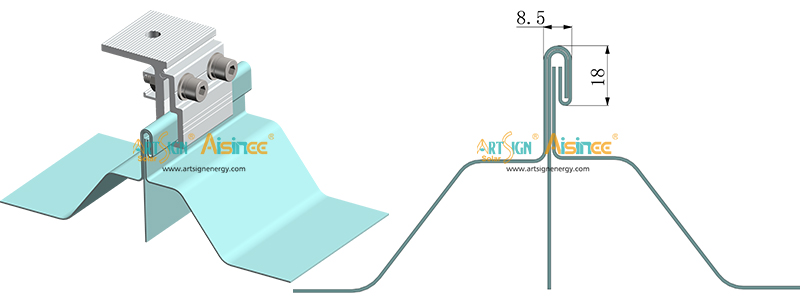
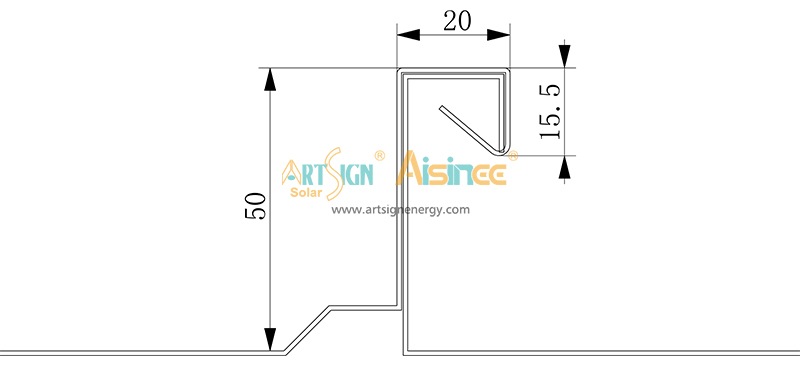
Standing seam clamps attach solar panels to standing seam metal roofs without drilling. The clamps grip onto the raised seams of the metal roof, creating a stable mounting base.

Best for:

· Standing seam metal roofs

· Industrial and commercial buildings

Installation Process:

1. Align the Clamps: Position clamps along the standing seams.

2. Secure with Set Screws: Tighten screws without penetrating the metal.

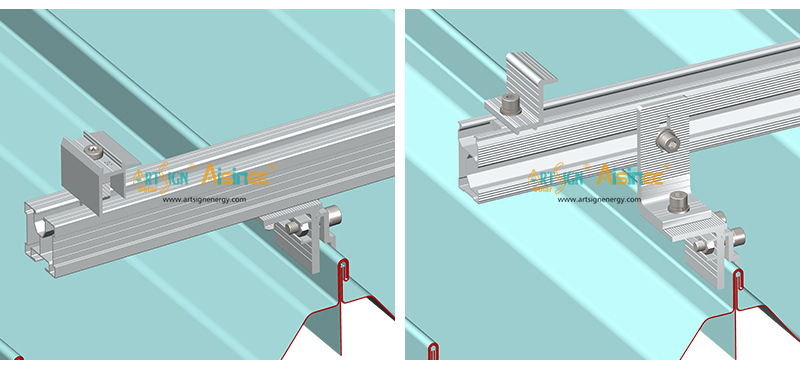
3. Attach Rails or Direct Mount Panels: Depending on the system, secure the solar panels directly or via a racking system.

Advantages:

· No drilling or adhesives required

· Strong, secure attachment

· Suitable for high-wind areas

Considerations:

· Only compatible with standing seam metal roofs

· Clamp quality must be high to prevent slipping


Roof-friendly solar panel installation methods 

4. Solar Panel Roof Tiles & Integrated Solar Roofing

How It Works:
Solar roof tiles replace traditional roofing materials and function as both a protective roof covering and a solar energy system. These tiles integrate seamlessly into the roof, eliminating the need for additional mounting.

Best for:

· New constructions or roof replacements

· Homeowners seeking an aesthetic solar solution

Installation Process:

1. Remove Existing Roofing Material (if necessary).

2. Install Solar Roof Tiles in Place of Standard Tiles.

3. Connect Tiles to the Solar Energy System.

Advantages:

· Aesthetically pleasing, blends with the roof

· No need for mounting brackets or rails

· Long-lasting and durable

Considerations:

· Expensive compared to traditional panels

· Requires professional installation


Key Factors to Consider When Choosing a Non-Drilling Solar Mounting System

· Roof Type & Structure: Different roofs require different non-penetrative solutions.

· Wind & Snow Load Considerations: Ensure the system can withstand local weather conditions.

· Weight Capacity: Ballasted systems require a strong roof load-bearing capacity.

· Ease of Installation & Removal: Some methods allow for temporary or modular setups.

· Aesthetics & Visibility: Integrated solutions provide seamless designs.

· Cost & Budget: Non-drilling systems vary in price based on material and complexity.


FAQs – Attaching Solar Panels to a Roof Without Drilling

Q1: Can I install solar panels without drilling holes in any type of roof?

A: Not all roofs support drill-free solar installations. Flat roofs, standing seam metal roofs, and new builds with solar roof tiles are the best candidates.

Q2: Do non-penetrative solar mounting systems hold up in strong winds?

A: Yes, but proper engineering calculations are necessary. Ballasted systems often include wind deflectors, and clamp-based systems have high-grip designs.

Q3: Are adhesive-based solar panel mounting solutions reliable?

A: Industrial-grade adhesives can provide long-lasting bonding, but they must be applied correctly and are best for low-weight solar panels.

Q4: What happens if I need to remove or relocate my solar panels?

A: Ballasted and clamp-based systems allow for easier removal, while adhesive-based systems may require careful detachment to avoid damage.

Q5: How do I ensure my non-drilling installation complies with building codes?

A: Always check with local regulations and building codes before installation to ensure compliance with safety and structural requirements.


Installing solar panels without drilling is a feasible solution for many homeowners and businesses looking to preserve their roof’s integrity. Whether using ballasted systems, adhesive mounts, standing seam clamps, or solar roof tiles, choosing the right method depends on the roof type, load capacity, and environmental conditions.

By selecting a secure, well-engineered solar mounting system, it is possible to achieve a long-lasting, efficient, and damage-free solar installation.

How Do You Install Solar Panel Roof Brackets? ——A Professional Guide

As the global adoption of solar energy continues to rise, the proper installation of solar panel roof brackets has become a critical step in ensuring the structural integrity and efficiency of solar power systems. Roof brackets serve as the primary connection between the solar mounting system and the roof, providing stability, durability, and long-term performance.

This guide will provide an in-depth, professional approach to installing solar panel roof brackets, covering different roof types, installation methods, and best practices for a secure and reliable solar mounting system.


Solar Panel Roof Brackets 


Understanding Solar Panel Roof Brackets

Solar panel roof brackets are key components of a photovoltaic (PV) mounting system, designed to support solar panels while ensuring minimal impact on the roof structure. These brackets vary based on roof type, local climate conditions, and load-bearing requirements.

Types of PV Roof Brackets by Roof Material

· Tile Roof: Utilizes hanger bolts, tile hooks, or aluminum plates for secure attachment.

· Metal Roof: Includes L-feet, standing seam clamps, or mini-rail systems to minimize penetrations.

· Asphalt Shingle Roof: Requires flashing-mounted brackets to prevent water leakage.

· Flat Roof: Often uses ballast-mounted brackets or penetrating anchor systems for stability.

Each type of bracket ensures compatibility with different roofing materials while maintaining optimal weight distribution and structural strength.


Step-by-Step Installation Guide for Solar Panel Roof Brackets

Step 1: Site Evaluation and Preparation

Before beginning installation, conduct a thorough site assessment to ensure:

· The roof structure can support the additional weight of the solar system.

· The selected bracket system is compatible with the roof material.

· The installation complies with local building codes and wind load requirements.

Step 2: Measuring and Marking the Bracket Positions

· Create a roof layout plan to determine the optimal bracket placement.

· Mark precise mounting points, ensuring even weight distribution across the roof.

· Align bracket positions with the rafters or structural support beams for maximum stability.

Step 3: Installing the Solar Roof Brackets

A. Solar Tile Roof Bracket Installation

1. Carefully remove or adjust tiles where the brackets will be installed.

2. Drill pilot holes and insert hanger bolts or stainless steel fasteners into the rafters.

3. Apply weatherproof sealing around penetration points.

4. Secure the aluminum mounting plate or tile hook.

5. Reposition the tiles and ensure a flush fit.

B. Solar Metal Roof Bracket Installation

1. For corrugated or trapezoidal metal roofs, attach mini-rails or L-feet using self-tapping screws.

2. Use EPDM sealing gaskets to prevent leaks at penetration points.

3. For standing seam roofs, utilize non-penetrative clamps to secure the brackets.

C. Solar Asphalt Shingle Roof Bracket Installation

1. Lift the shingles and install flashing to create a waterproof barrier.

2. Drill holes and insert lag bolts into the rafters.

3. Secure the brackets and apply sealant to ensure a watertight connection.

D. Solar Flat Roof Bracket Installation

1. Use ballasted mounting brackets to avoid roof penetrations where possible.

2. For penetrative mounting, secure anchor bolts and apply waterproofing measures.

3. Adjust the bracket tilt angle for optimal solar exposure.

Step 4: Attaching the Solar Mounting Rails

· Secure the horizontal or vertical mounting rails onto the installed brackets.

· Ensure proper alignment, tightening all fasteners for maximum stability.

· Double-check the structure for leveling and weight distribution.

Step 5: Installing the Solar Panels

· Place the solar modules onto the mounting rails.

· Secure them using mid-clamps and end-clamps, ensuring a firm connection.

· Tighten all fasteners and inspect for stability.

Step 6: Final Inspection and Safety Checks

· Perform a torque check on all connections.

· Apply additional sealant if necessary for enhanced waterproofing.

· Conduct a structural integrity test before proceeding with wiring and electrical connections.


Secure Solar Bracket Installation 


Best Practices for Secure Solar Bracket Installation

Use High-Quality Materials: Opt for corrosion-resistant aluminum or stainless steel brackets for longevity.
Ensure Proper Waterproofing: Utilize EPDM gaskets, flashing, and sealants to prevent leaks.
Follow Manufacturer Guidelines: Adhere to specific installation requirements for each bracket type.
Account for Wind and Snow Loads: Design the system to withstand local environmental conditions.
Regular Maintenance Checks: Periodically inspect bracket connections for any signs of wear or loosening.


Conclusion

The correct installation of solar panel roof brackets is crucial for ensuring long-term system stability and efficiency. By selecting the right bracket type, following proper installation procedures, and maintaining strict waterproofing measures, installers can maximize the durability and performance of a solar PV system.

With advancements in solar mounting technology, the industry continues to evolve, providing cost-effective, efficient, and structurally secure solar mounting solutions for various roof types. Investing in high-quality materials and professional installation ensures a reliable and high-performance solar energy system.

How Solar Panel Mounting Systems Improve Energy Efficiency?


When it comes to solar energy, the focus is often on the panels themselves—their efficiency, output, and technological advancements. However, one crucial element that plays a significant role in maximizing solar energy generation is the solar panel mounting system. These systems not only hold the solar panels in place but also influence how much sunlight the panels can absorb, how they interact with the environment, and their overall performance.

In this blog post, we will explore how solar panel mounting systems contribute to energy efficiency, ensuring that your solar installation operates at its peak potential.


What Is a Solar Panel Mounting System?

A solar panel mounting system is a framework that secures solar panels to rooftops, the ground, or other structures. The mounting system ensures that the panels are positioned correctly to optimize solar exposure and energy collection. These solar racking systems come in various designs, including roof mounts, ground mounts, and solar carports. They are made from materials like aluminum, steel, or stainless steel, and are designed to withstand environmental stresses such as wind, rain, snow, and UV radiation.


How Mounting Systems Impact Solar Energy Efficiency

1. Optimal Panel Angle for Maximum Sunlight Exposure

One of the most important functions of a mounting system is positioning the panels at the correct angle to capture the most sunlight throughout the day. Tilted mounting systems can adjust the angle of the solar panels based on the geographical location and time of year, ensuring that the panels are always optimally aligned with the sun.

  • Fixed Tilt Systems: These are designed for specific latitudes and provide a set angle that ensures the panels receive maximum exposure to sunlight.
  • Adjustable Tilt Systems: These allow for periodic adjustments to the angle, which can significantly boost energy efficiency, especially in regions with varying sunlight angles throughout the year.

The angle of installation impacts the solar energy absorption rate, and a well-designed mounting system ensures that panels maintain their efficiency by capturing the sun's rays at the optimal angle.


2. Minimizing Shading and Maximizing Airflow

A solar panel mounting system also plays a role in minimizing shading and enhancing airflow beneath the panels, both of which are crucial for improving efficiency:

Shading Issues: When solar panels are placed too close to each other or to obstructions (like chimneys or trees), shading can significantly reduce their performance. PV mounting systems designed to space panels out correctly can reduce this problem. For example, ballasted systems or rack mounts ensure that panels are spaced at an ideal distance to reduce shadow effects.

Improved Airflow: A well-spaced system allows air to flow freely underneath the panels. This reduces the heat buildup on the solar panels, which is a major contributor to decreased efficiency. Overheating can lower a panel's performance, so solar mounting systems that allow for better ventilation are key to maintaining energy output.

·          

3. Durability and Structural Bracket

Solar panel efficiency is also closely linked to how well the system is built to withstand environmental conditions. solar panel mount systems made of durable materials like stainless steel or hot-dip galvanized steel can provide stability and protection for the solar panels. A secure installation prevents solar panels from moving or becoming misaligned due to wind, rain, or snow accumulation, all of which could decrease efficiency over time.

  • Wind Resistance: High-wind areas require sturdy mounting systems that prevent the panels from shifting or being damaged. Systems with wind-resistant features keep the panels in the right position for optimal energy absorption.
  • Snow and Ice Management: Snow can block sunlight and create added weight on solar panels. Ground-mounted systems or those designed with steep angles can help snow slide off easily, preventing any potential decrease in energy output.


4. Improved Performance in Various Climates

Solar panel mounting systems can be specifically designed for use in different climates and geographic regions. For example, marine-grade stainless steel systems are often used in coastal areas to resist corrosion from salty air, while aluminum mounts are lighter and often used in residential settings.

By choosing the right mounting system for your location, you can ensure that your solar panels maintain their energy efficiency no matter what environmental challenges you face. For instance:

  • In hot climates, pv mount systems that allow for ample airflow beneath the panels can keep them cool and prevent overheating.
  • In cold climates, pv mount systems that allow for snow to slide off easily help maintain the panels' exposure to sunlight and avoid efficiency losses due to snow buildup.


5. Enhanced Solar Panel Lifespan

A well-installed mounting system not only improves energy efficiency but also extends the lifespan of the solar panels. Solar panels that are installed correctly are less prone to wear and tear, such as scratches, corrosion, and misalignment, which can affect their long-term performance. Systems designed to reduce vibration and wind load help protect the panels from mechanical stress, ensuring that they continue to generate energy efficiently for years.


Types of Solar Panel Mounting Systems

To understand how the choice of mounting system affects energy efficiency, it's important to look at the main types of mounting solutions available:

1. Roof Mounts

Roof-mounted solar systems are the most common type for residential properties. These systems are fixed to the roof using either penetrating mounts or non-penetrating mounts (which use ballast or weight to secure the panels without drilling into the roof). Roof mounts provide the ideal solution for maximizing available space and improving panel alignment, especially for homeowners who want to avoid losing ground space.

2. Ground Mounts

Ground-mounted solar panels offer the greatest flexibility in terms of panel positioning. These systems are particularly useful for larger installations or properties where roof space is limited. Ground mounts also allow for optimal tilt angles and better airflow beneath the panels, resulting in improved efficiency.

3. Solar Carports

Solar carports are increasingly popular in commercial and residential areas. They provide a double benefit: generating solar energy while also protecting vehicles from the elements. These solar mount systems offer elevated panel placements, which allow for better airflow, less shading, and improved overall performance.


While solar panels are the primary energy generators in any solar power system, the solar mounting system is equally important when it comes to maximizing energy efficiency. From ensuring optimal panel angles to improving airflow and minimizing shading, the mounting system has a significant impact on how well your solar panels perform.

Choosing the right mounting system will not only optimize energy output but also increase the durability and longevity of your solar installation. Whether you’re installing solar panels on your roof, on the ground, or in a solar carport, ensuring that the mounting system is designed to meet your specific needs can lead to long-term savings and better energy production.

At Xiamen TopFence Co., Ltd, we offer a wide range of solar mounting solutions to meet the diverse needs of residential, commercial, and industrial installations. Contact us today to learn how we can help you optimize your solar energy system!


How to Choose the Best Ground Mount Solar Racking System?

As the demand for solar energy grows, ground-mounted solar racking systems have become an essential choice for large-scale and residential solar projects. Selecting the right racking system can directly impact installation efficiency, system durability, and energy output. In this guide, we will walk you through the key factors to consider when choosing the best ground mount solar racking system.


1. Understanding Ground Mount Solar Racking Systems

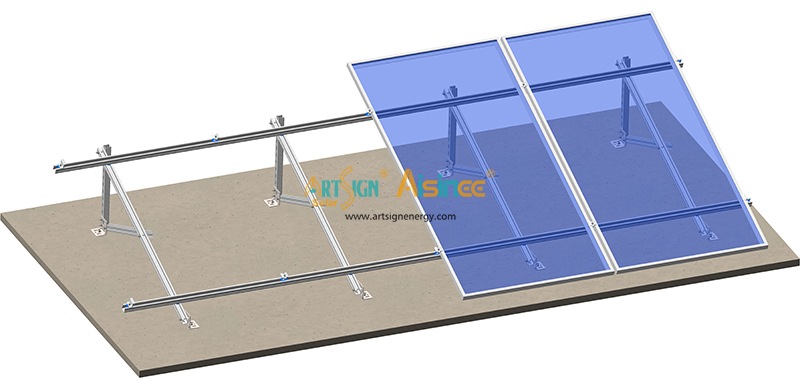
Unlike rooftop solar mounting, ground-mounted systems are installed directly on open land or undeveloped areas, making them ideal for solar farms, commercial installations, and homeowners with sufficient space. These systems provide greater flexibility in tilt angle adjustments, panel orientation, and scalability, ensuring optimal sunlight exposure.


How to install ground mount solar panels


2. Key Factors in Choosing the Right Ground Mount Solar Racking System

(1) Type of Ground Mounting System

There are two main types of ground-mounted solar racking systems:

  • Fixed-Tilt Racking System: Panels are mounted at a fixed angle, providing lower installation costs and requiring minimal maintenance. This is an excellent choice for areas with stable sunlight conditions.
  • Solar Tracking System: Uses either single-axis or dual-axis tracking to follow the sun's movement, significantly improving energy yield by 10-25%. However, these systems come with higher upfront costs and require more maintenance.

Choosing between these two depends on budget, land space, and energy output requirements.

(2) Foundation Type & Soil Conditions

The foundation of your ground-mounted solar system must be chosen based on the soil type, terrain, and environmental conditions:

  • Ground Screws: Ideal for rocky, sandy, or uneven terrain, as they require no concrete and provide strong support.
  • Concrete Foundations: Best for areas with soft soil or high wind loads, providing maximum stability but increasing installation time and costs.
  • Pile-Driven Foundations: Suitable for firm soil conditions, offering fast installation and cost-effectiveness.

Conducting a geotechnical study before installation helps determine the best foundation type for your project.

(3) Material & Durability

Selecting the right material ensures long-term durability and resistance to environmental challenges:

  • Galvanized Steel: High structural strength and corrosion resistance, making it suitable for extreme weather conditions.
  • Aluminum Alloy: Lightweight and corrosion-resistant, but may be less durable for large-scale installations.

For projects in coastal, desert, or high-humidity regions, opt for hot-dip galvanized steel or anodized aluminum for superior longevity.

(4) Wind & Snow Load Capacity

A well-engineered ground mount solar racking system should be able to withstand strong winds, heavy snowfall, and extreme weather conditions. Key considerations include:

  • Wind Load Rating: Ensure the racking system meets local wind speed standards (e.g., up to 150 mph for hurricane-prone areas).
  • Snow Load Capacity: Select systems designed to handle high snow accumulation without structural failure.

Checking compliance with international certifications (IEC, UL, AS/NZS 1170, JIS, etc.) is essential to ensure quality and durability.

(5) Installation & Maintenance

Choosing a system with a simple, modular design reduces installation costs and time. Factors to look for:

  • Pre-assembled or modular components for easy assembly.
  • Fewer bolts and fasteners to minimize labor costs.
  • Ease of maintenance with accessible tilt angles and minimal cleaning requirements.

Opting for racking systems with integrated cable management solutions also helps in keeping the installation neat and reducing long-term maintenance issues.


Fixed-tilt solar racking vs. tracking


3. Cost vs. Performance Considerations

While fixed-tilt systems are more affordable, tracking systems can provide higher energy yields. Here’s a cost-performance comparison:

System Type Initial Cost Maintenance Energy Yield Best for
Fixed-Tilt Low Low Standard Large-scale farms, stable sunlight regions
Single-Axis Tracker Medium Medium 10-20% more than fixed Utility-scale projects, variable sunlight conditions
Dual-Axis Tracker High High 20-25% more than fixed High-efficiency solar farms, premium applications

For most commercial and utility-scale projects, single-axis trackers provide a balance between cost and energy production efficiency.


4. Compliance & Warranty

Before finalizing your purchase, check for:
Certifications: Ensure compliance with ISO, UL, IEC, AS/NZS standards.

Manufacturer’s Warranty: A 10-25 year warranty guarantees long-term performance.

Supplier Reputation: Work with experienced solar racking providers with proven track records.


Conclusion

Selecting the best ground mount solar racking system depends on factors such as system type, terrain, material quality, wind/snow load capacity, and cost-effectiveness. Whether you choose a fixed-tilt system for affordability or solar tracking for maximum efficiency, investing in a durable, high-quality racking structure ensures long-term solar success.

How to Choose the Best Solar Panel Clamps?

Selecting the right solar panel clamps is crucial for ensuring the stability, durability, and efficiency of a solar mounting system. Whether for roof-mounted or ground-mounted solar installations, the clamps play a vital role in securing solar panels and withstanding various environmental conditions such as strong winds, heavy snow loads, and temperature fluctuations.

With a wide range of solar panel clamps available in the market, how do you determine the best one for your project? In this article, we’ll explore the different types of clamps, key selection factors, and best industry practices to help you make an informed decision.


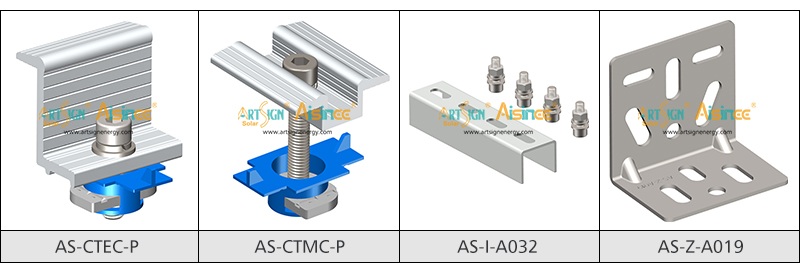
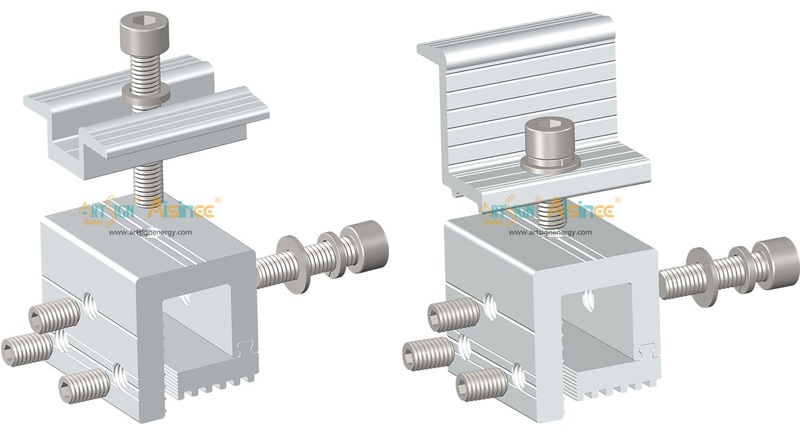
 Aluminum solar panel clamps 


Types of Solar Panel Clamps

Solar panel clamps are generally categorized into mid clamps and end clamps, each serving a specific purpose in securing the solar modules.

1. Mid Clamps

· Used to connect two adjacent solar panels in a row.

· Provides uniform spacing and structural integrity.

· Typically made from high-strength aluminum or stainless steel for corrosion resistance.

2. End Clamps

· Installed at the edges of the solar array to secure the outermost panels.

· Ensures the panels remain fixed even in harsh weather conditions.

· Available in different sizes and designs to fit various panel thicknesses.

Additionally, specialized clamps such as railless clamps, adjustable clamps, and frameless panel clamps are also available for unique installation requirements.

 Solar mounting clamps for framed panels


Key Factors to Consider When Choosing Solar Panel Clamps

1. Compatibility with Solar Modules

Not all clamps fit every solar panel type. It’s important to check:

· Panel thickness – Ensure the clamp matches the dimensions of your solar module.

· Framed vs. Frameless panels – Some clamps are designed exclusively for frameless glass panels, while others work with standard framed modules.

2. Material and Durability

High-quality solar clamps are made from anti-corrosive materials to withstand outdoor exposure for decades. Common materials include:

· Aluminum Alloy (6063-T5, 6005-T5) – Lightweight, corrosion-resistant, and high-strength.

· Stainless Steel (SUS 304, SUS 316) – Excellent durability, commonly used in harsh weather conditions.

3. Weather and Load Resistance

Solar clamps must be able to withstand wind loads, snow loads, and thermal expansion. Ensure that the clamps are tested and certified to meet industry standards such as ISO, CE, and UL certifications.

4. Ease of Installation

Time and labor costs can be reduced by selecting clamps with:

· Pre-assembled components for quick installation.

· Tool-free locking mechanisms that simplify the mounting process.

· Adjustable designs that fit multiple panel sizes.

5. Compatibility with Mounting Structures

Different solar mounting systems require specific clamp designs, including:

· Rail-based mounting systems – Clamps are attached to rails that hold the solar panels.

· Railless mounting systems – Clamps attach directly to the roof, reducing installation components.

· Ground-mounted structures – Heavy-duty clamps designed for stability in open-field installations.

6. Certification and Compliance

Ensure the clamps comply with international quality and safety standards, including:

· TÜV Rheinland certification for quality assurance.

· ISO 9001 certification for manufacturing excellence.

· ASTM and UL standards for mechanical integrity.


Best Practices for Selecting and Installing Solar Clamps

Choose adjustable clamps if your project involves panels of different thicknesses.
Opt for stainless steel fasteners to prevent corrosion over time.
Verify that the clamps are tested for wind and snow loads specific to your region.
Ensure proper torque settings during installation to avoid panel damage.
Work with trusted solar racking manufacturers to get high-quality clamps with warranties.


Choosing the right solar panel clamps is a crucial step in ensuring a secure, durable, and cost-effective solar installation. By considering compatibility, material quality, load resistance, and ease of installation, you can select the best clamps for your project.

For businesses and installers, investing in high-quality, certified solar clamps not only enhances system longevity but also boosts customer satisfaction. Make sure to source clamps from reliable manufacturers to guarantee optimal performance for your solar mounting system.

How to Choose the Right Solar Panel Mounting System for Your Roof?

When it comes to installing solar panels on your roof, one of the most important decisions you'll make is choosing the right solar panel mounting system. This system serves as the foundation for your solar panels, ensuring they are securely attached and positioned for optimal sunlight exposure. But with so many different mounting options available, how do you choose the best one for your roof?

In this blog, we will guide you through the process of selecting the right solar mounting system based on your roof type, budget, and long-term energy goals. Whether you are a homeowner looking to install solar panels for the first time or are upgrading an existing system, this article will help you make an informed decision.


 Understanding the Basics of Solar Panel Mounting Systems

A solar panel mounting system is the structure that holds solar panels in place on your roof. It plays a key role in ensuring that your panels are installed securely, are angled correctly to capture maximum sunlight, and are able to withstand weather conditions over time.

There are several types of solar mounting systems, and the right one depends on various factors, such as the roof type, location, and your personal preferences.


Types of Roofs and the Best Solar Panel Mounting System for Each

.Flat Roofs

Flat roofs are common in commercial buildings, urban areas, and some residential homes. Installing solar panels on a flat roof requires a mounting system that can tilt the panels at the right angle to capture sunlight effectively.

Ballasted Mounting Systems: These are often used for flat roofs and do not require penetration into the roof. Instead, they use heavy weights or concrete blocks to hold the panels in place. Ballasted mounts are ideal for flat roofs that cannot handle drilling or when you want to avoid roof penetration.

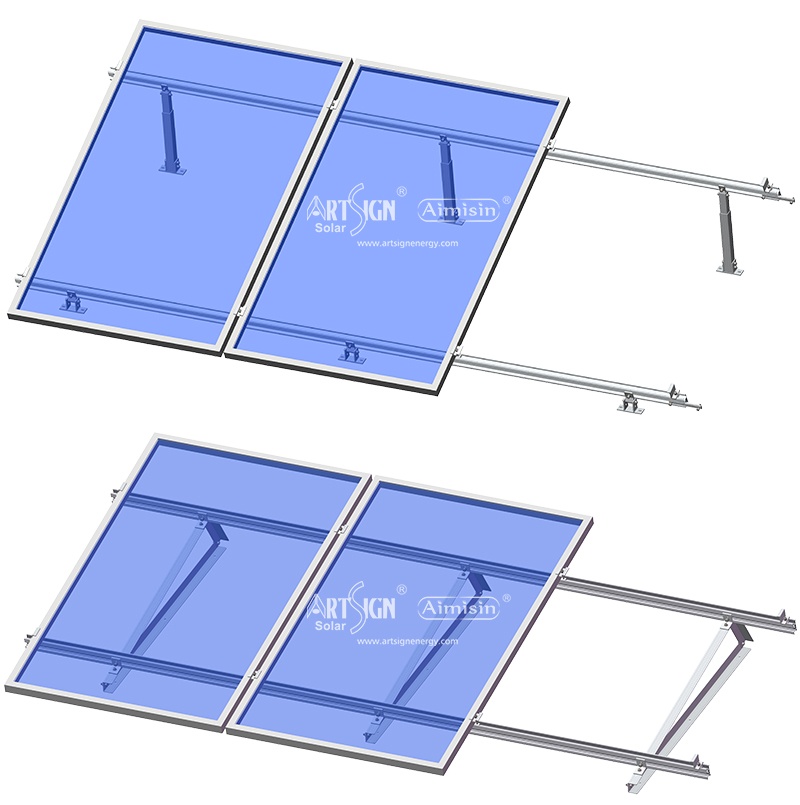
Adjustable Tilt Systems: These systems allow you to adjust the angle of the solar panels to optimize energy production. This is especially beneficial for homeowners or businesses that want to maximize their solar output throughout the year.

Fixed Tilt Systems: Fixed systems are simpler and more affordable than adjustable tilt systems. However, they don't allow for angle adjustments, making them less flexible for maximizing energy production.

.Sloped Roofs

Sloped roofs are the most common type of residential roof, with angles typically ranging between 15° to 45°. These roofs offer a natural angle for solar panels, which can help them capture sunlight more effectively.

Rail-Based Mounting Systems: These are the most common mounting solutions for sloped roofs. Rails are attached to the roof structure, and solar panels are fixed onto the rails using specialized clamps. These systems are adjustable, so they allow for precise panel positioning to maximize solar exposure.

Rail-Less Mounting Systems: For a sleeker and more modern design, rail-less systems are becoming increasingly popular. This system does not use rails, which makes it quicker and easier to install, and provides a cleaner look by eliminating visible hardware. It's also cost-effective and lightweight.

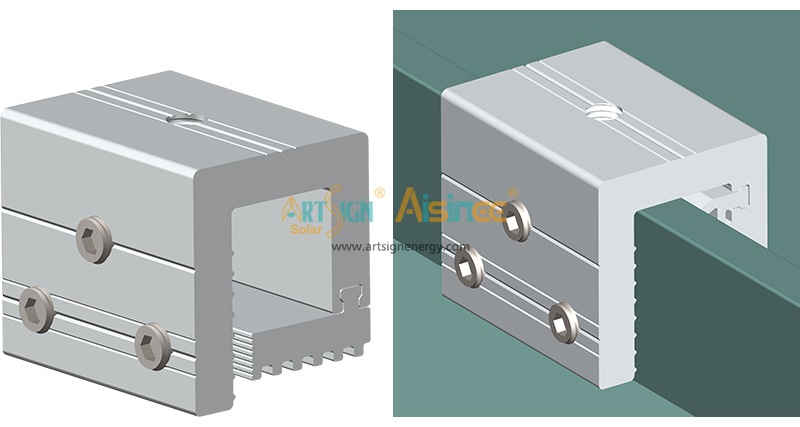
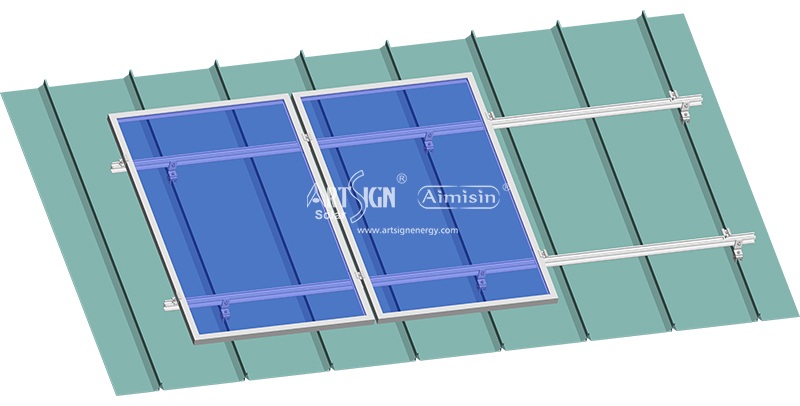
Standing Seam Roof Mounts: If you have a metal roof with standing seams, you can install a standing seam roof mount. These mounts attach directly to the seams of the roof without causing any roof penetrations, keeping the structure waterproof. These mounts are particularly great for commercial buildings with metal roofs.


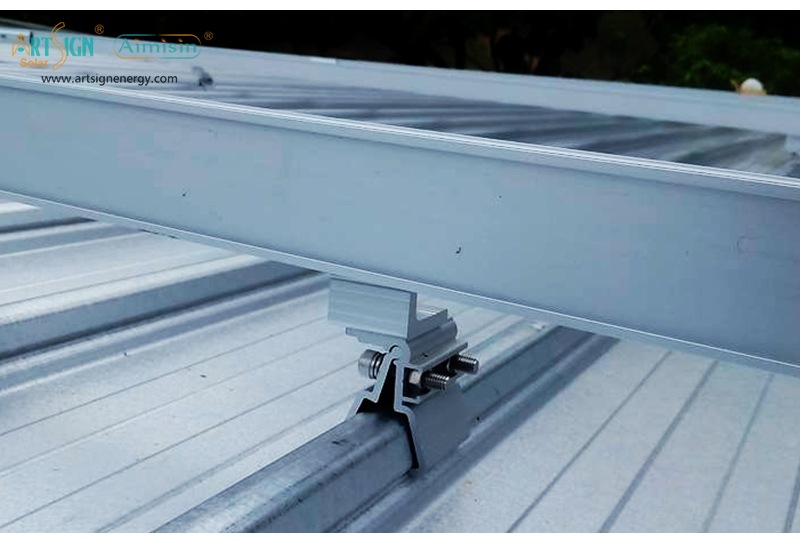
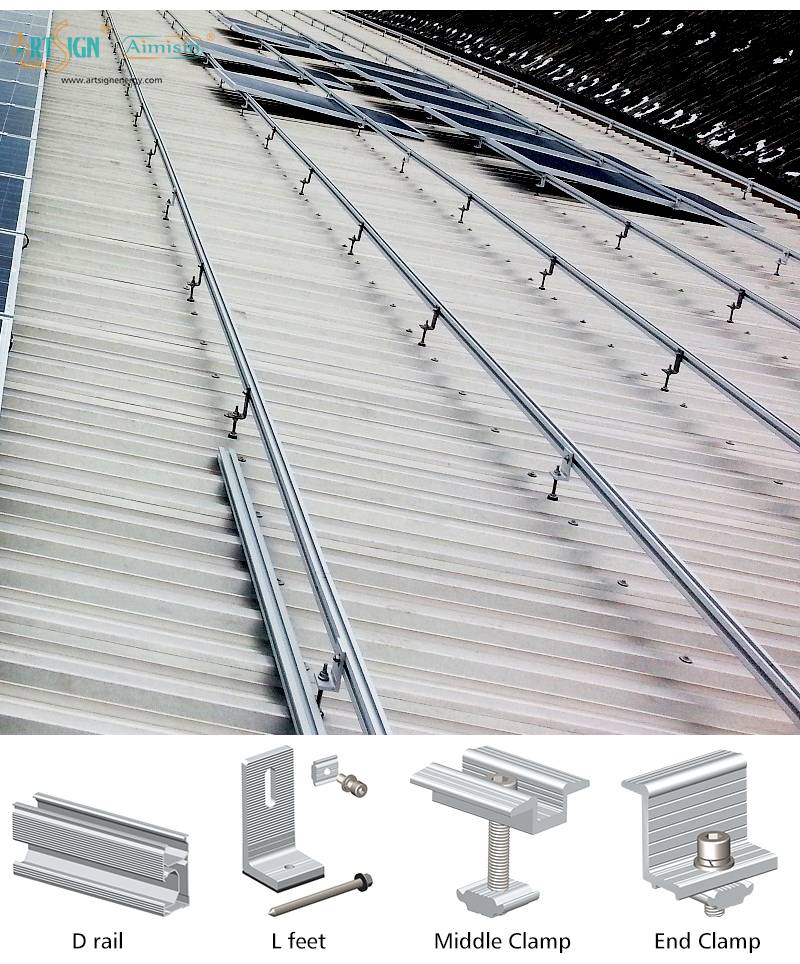
easy installation solar mounts for metal roofs 

.Clay or Tile Roofs

Tile roofs can be more challenging to work with because of the fragile nature of the tiles. However, there are specialized mounting solutions designed to minimize damage while securing solar panels.

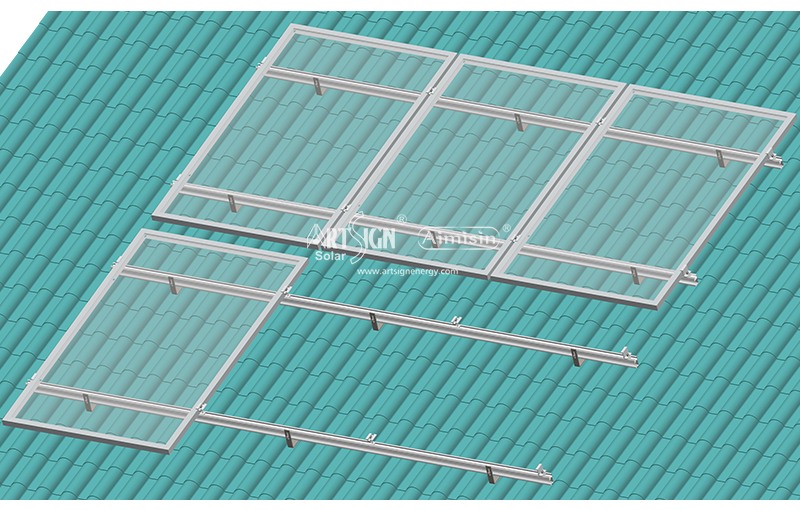
Tile Hook Systems: These systems are specifically designed for tile roofs. They use hooks that attach to the rafter beneath the tiles, allowing the panels to be securely mounted without damaging the tiles. The key advantage is that these mounts are very durable and provide strong support.

Rail-Based or Rail-Less Systems: Depending on the specific needs of your tile roof, either rail-based or rail-less mounting systems can be adapted to work with tiles, providing the best balance of efficiency and aesthetics.


Considerations When Choosing a Solar Mounting System

When choosing the right solar panel mounting system for your roof, consider the following factors:

1. Roof Material

The type of material your roof is made from plays a major role in determining which mounting system is best. For example:

Metal roofs work well with standing seam mounts that don’t require roof penetrations.

Clay or tile roofs require special hooks or tile-specific mounts to avoid damage.

2. Roof Angle

If your roof is flat, you will need a tilting system to position the panels at the optimal angle for energy production. For sloped roofs, the natural slope can often accommodate the panels without additional adjustments.

3. Roof Condition and Age

Older roofs may not have the structural integrity to support heavy mounting systems. Before installing solar panels, ensure that your roof is in good condition and capable of withstanding the weight and pressure of the panels and mounting system.

4. Budget

Rail-less systems tend to be more cost-effective and are easier to install, which may be ideal for smaller residential projects.

Rail-based systems are often more adjustable and flexible but may come with a higher cost.

Ballasted mounts are typically used for larger, flat-roof commercial projects, and can be more expensive due to the extra materials required.

5. Aesthetics

Some homeowners prefer a clean, modern look without visible rails. In this case, rail-less solar mounting systems offer a sleek and streamlined appearance that enhances the aesthetic appeal of your home.

6. Durability

Ensure that the mounting system you choose is durable and can withstand environmental factors such as high winds, rain, snow, and extreme temperatures. Stainless steel and aluminum are the most common materials for high-strength mounts due to their corrosion resistance and long lifespan.


Advantages of Proper Solar Panel Mounting Systems

A high-quality solar mounting system not only ensures the longevity and stability of your panels, but it can also improve the overall efficiency of your solar installation. The right pv mounting system will:

· Maximize panel performance by ensuring the correct angle for sunlight exposure.

· Enhance the longevity of both your panels and roof by providing a secure and stable attachment.

· Reduce maintenance costs by preventing unnecessary wear and tear on both the solar system and roof structure.

· Increase energy production, ensuring that your investment in solar technology provides the best returns over time.


Conclusion: Make the Right Choice for Your Roof

Choosing the right solar panel mounting system for your roof is a crucial step in ensuring that your solar installation is safe, efficient, and long-lasting. Whether you have a flat roof, sloped roof, or specialized roofing material, there is a mounting system available to meet your needs.

Consider your roof type, budget, and energy goals when selecting the best system, and consult with a professional installer to make sure the system is correctly designed and implemented. With the right solar panel mounting system, you can be confident that your solar panels will continue to perform at their best for many years to come.

How to Optimize Ballasted Solar Systems for Wind Resistance?

Flat roof solar mount systems are becoming increasingly popular due to their flexibility, cost-effectiveness, and ease of installation. Among the various pv mounting options, ballasted solar systems stand out as a preferred choice for flat roofs because they don't require roof penetration. However, optimizing these systems for wind resistance is critical to ensure durability and energy efficiency, especially in regions with high wind speeds.

In this guide, we’ll explore effective strategies and considerations to maximize the wind resistance of ballasted solar panel mounting systems.


Understanding the Challenges of Wind on Solar Ballasted Systems

Ballasted solar panel mounting bracket systems rely on weight to keep the solar panels and mounting structures securely in place. When wind loads exert uplift or lateral forces, these systems must resist those forces without compromising the roof's integrity or the system's alignment.

Key challenges include:

· Uplift Forces: Wind can create lift under solar panels, potentially dislodging them.

· Lateral Forces: Strong gusts can push against the panels, shifting the system.

· Edge Effects: Panels near roof edges face stronger wind forces due to vortex effects.


Wind-resistant ballasted solar systems


Strategies for Optimizing Wind Resistance

1. Site-Specific Wind Load Analysis

Conducting a thorough wind load analysis for the installation site is crucial. Factors to consider:

· Local wind speed and direction.

· Roof height and surrounding structures.

· Building exposure category (e.g., urban vs. open terrain).

Using software tools or consulting with structural engineers can help design a system tailored to the site’s specific wind conditions.


2. Strategic System Design

Panel Orientation:

· Orient panels parallel to prevailing wind directions to reduce drag and uplift forces.

· Avoid tilting panels at angles that could amplify wind pressure.

Edge and Corner Zone Reinforcement:

· Add extra ballast or anchoring mechanisms near roof edges and corners where wind loads are highest.

· Use aerodynamic wind deflectors or baffles to minimize vortex effects.


3. Optimize Ballast Distribution

· Distribute ballast weights evenly across the system while concentrating additional weight in high-stress areas.

· Ensure the ballast doesn’t exceed the roof’s load-bearing capacity.


4. Use Aerodynamic Mounting Systems

Modern ballasted systems incorporate aerodynamic designs that reduce wind uplift. Features include:

· Low-Profile Designs: Minimize the surface area exposed to wind.

· Integrated Deflectors: Redirect airflow to reduce pressure.


5. Choose High-Quality Components

Invest in durable materials resistant to weathering and corrosion. Components like clamps, rails, and ballast trays should be designed to withstand prolonged exposure to wind and other environmental factors.


6. Regular Maintenance and Inspections

Wind can loosen connections and shift ballast over time. Schedule periodic inspections to ensure:

· Ballast weights remain securely in place.

· All hardware, including clamps and brackets, is tight and corrosion-free.

· Panels and mounts show no signs of displacement or damage.


The Benefits of Optimizing for Wind Resistance

A well-optimized ballasted solar system offers:

· Enhanced Safety: Prevents accidents caused by dislodged panels.

· Longevity: Reduces wear and tear on components, extending the system’s lifespan.

· Maximized Efficiency: Ensures panels remain correctly aligned for optimal energy production.

· Lower Maintenance Costs: Minimizes repairs and adjustments due to wind damage.


Optimizing ballasted solar systems for wind resistance is essential for achieving long-term performance and safety. By carefully analyzing wind loads, designing for site-specific conditions, and investing in high-quality materials, you can ensure your flat roof solar installation withstands even the harshest weather conditions.

At Xiamen TopFence Co.,Ltd, we specialize in durable and aerodynamic ballasted solar mounting systems that provide superior wind resistance. Contact us today to discuss your project and find the perfect solution for your flat roof solar needs!

How to Prevent Water Leakage in Solar Roof Installations?

Solar roof installations are an excellent way to harness renewable energy and reduce electricity costs. However, one of the most common concerns homeowners face is the potential for water leakage. Improper installation or poor maintenance can lead to water seeping into your home, causing damage to the structure and reducing the efficiency of your solar panels. Fortunately, with the right precautions, you can prevent water leakage and ensure your solar roof system operates smoothly for years to come.


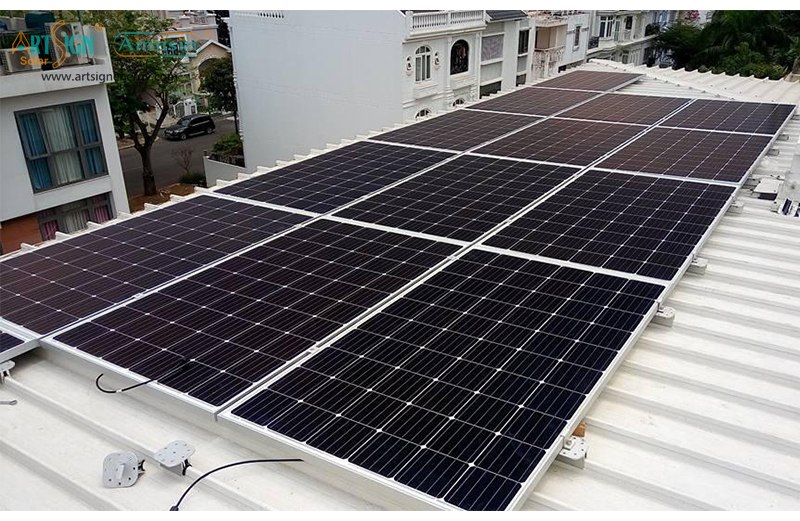
Solar Roof Installation 


1. Choose a Qualified Installer

The first step in preventing water leakage is to hire a reputable and experienced solar installation company. A qualified installer will have the expertise to assess your roof's condition, identify potential risks, and use proper sealing techniques. They will also ensure that the solar mounting system is securely attached without compromising the roof's integrity. Always verify the installer's credentials and ask for references or reviews from previous clients.


2. Inspect and Prepare the Roof

Before installing solar panels, it`scrucial to inspect your roof for any existing damage, such as cracks, loose shingles, or worn-out sealant. Address these issues beforehand to create a solid foundation for the installation. Additionally, consider applying a waterproof underlayment or membrane to provide an extra layer of protection against water infiltration.


3. Use High-Quality Flashing and Sealants

Flashing is a critical component in preventing water leakage around the areas where solar mounts penetrate the roof. High-quality, corrosion-resistant flashing should be used to seal these gaps effectively. Pair this with durable, weatherproof sealants to ensure a watertight barrier. Regularly inspect the flashing and sealants for wear and tear, especially after extreme weather conditions.


4. Ensure Proper Panel Placement

The placement of solar panels plays a significant role in preventing water leakage. Panels should be installed with a slight tilt to allow rainwater to run off smoothly. Avoid placing panels too close to the edges of the roof, as this can create areas where water might pool or seep underneath. Proper spacing and alignment are key to maintaining the solar roof drainage system.


5. Conduct Regular Maintenance

Even with a flawless installation, regular maintenance is essential to prevent water leakage. Schedule periodic inspections to check for loose mounts, damaged sealants, or debris accumulation around the panels. Clean the panels and roof surface to prevent clogs that could lead to water pooling. Early detection of issues can save you from costly repairs down the line.


Solar Roof Installations

Preventing water leakage in solar roof installations requires careful planning, quality materials, and ongoing maintenance. By working with a qualified installer, preparing your roof properly, and using reliable sealing techniques, you can enjoy the benefits of solar energy without worrying about water damage. Remember, a well-maintained solar roof not only protects your home but also maximizes the efficiency and lifespan of your solar panels.

Rail vs Rail-less Solar Mounting Systems Which Is Right for You?

When it comes to solar panel installations, one of the key decisions you’ll face is choosing the right solar mounting system. While the solar panels themselves are the focus of most conversations, the pv mounting system plays an equally crucial role in ensuring the system's durability, performance, and cost-effectiveness.

Among the various types of mounting systems, rail-based and rail-less systems are two of the most commonly used options for solar panel installations. Both have their unique features, benefits, and considerations. But how do you decide which one is best for your project?

In this blog post, we’ll compare rail-based and rail-less solar mounting systems, examining their pros and cons to help you determine which system is best suited for your needs.


What Are Rail-Based and Rail-less Solar Mounting Systems?

Before we dive into the details, let's first understand what rail-based and rail-less systems are:

Rail-Based Solar Mounting Systems: These systems use metal rails to mount and support the solar panels. The panels are secured onto the rails, which are then fixed to the roof structure. The rails act as a frame that holds multiple panels in place and aligns them in the proper position.

Rail-less Solar Mounting Systems: As the name suggests, rail-less systems do not use the traditional metal rails. Instead, the solar panels are directly mounted onto the roof with specialized brackets and clamps, which eliminate the need for rails altogether. This type of system is typically lighter and has a simpler design.


Key Factors to Consider When Choosing Between Rail-Based and Rail-less Systems

1. Cost

Rail-Based Systems:

Higher Material Costs: Since these systems use metal rails as a primary component, the materials themselves can be more expensive.

More Installation Time: Due to the complexity of installing the rails and aligning the panels, the installation process can take longer, which may lead to higher labor costs.

Rail-less Systems:

Lower Material Costs: Rail-less systems generally have fewer components, making them more affordable in terms of materials.

Faster Installation: With no need for rails, these systems are typically quicker and easier to install, reducing labor costs and installation time.

Which is better for cost?

If you're working on a tight budget, rail-less systems can be more affordable. However, if you need a more robust system that can support heavier panels or larger installations, rail-based systems might be worth the extra cost.


2. Durability and Stability

Rail-Based Systems:

Highly Stable: Rail-based systems are known for their structural stability. The use of metal rails allows for better weight distribution and support, making these systems more resilient under harsh weather conditions, such as high winds and heavy snow.

Long-Lasting: Due to their sturdier design, rail-based systems are typically more durable and have a longer lifespan, especially in areas prone to extreme weather.

Rail-less Systems:

Lightweight Design: Rail-less systems are lighter and less bulky than rail-based systems, but this also means they may not offer the same level of stability in extreme weather conditions.

Compact and Aesthetic: These systems are often considered more aesthetically pleasing due to their minimalist design. However, they may require additional reinforcements for large installations or areas with heavy snowfall or high winds.


Which is better for durability?

Rail-based systems are generally more durable and stable, especially for commercial or large residential installations. If you live in an area with extreme weather conditions, a rail-based system might be the better option.

For regions with moderate weather, rail-less systems can be sufficient and still offer decent durability.


3. Aesthetics

Rail-Based Systems:

More Visible Components: With rail-based systems, the rails are more visible, which can sometimes detract from the overall aesthetic appeal of the installation.

Bulkier Look: The added bulk of the rails and brackets might not appeal to those looking for a sleeker design.

Rail-less Systems:

Minimalist and Sleek: One of the biggest selling points of rail-less systems is their aesthetic appeal. Without the need for large rails, the system is more compact and streamlined, making it ideal for homeowners or businesses looking for a more discreet and modern look.

Cleaner Lines: Since the system eliminates the rails, there are fewer visible components, providing a cleaner, more seamless appearance on the roof.

Which is better for aesthetics?

If aesthetics are important to you, rail-less systems are the clear winner. They provide a sleek and minimalist look that blends well with most roof designs.


4. Installation Flexibility

Rail-Based Systems:

More Flexibility in Panel Arrangement: With rails, you can adjust the orientation of the panels with more precision. This flexibility is particularly important for commercial installations where the panels need to be arranged in a specific layout or at a precise angle.

Versatility: These systems can be used on a wide variety of roof types, including both sloped and flat roofs.

Rail-less Systems:

Simple Installation: Rail-less solar mount systems are easier to install, which makes them a good choice for smaller installations where the panel layout is less complex.

Limited Adjustment: Without rails, there is less flexibility in adjusting the angle and positioning of the panels once installed. This could be a consideration for installations where angle optimization is crucial.


Which is better for flexibility?

For larger installations with complex configurations or varying roof types, rail-based pv mount systems offer more flexibility in adjusting panel layout and orientation.

For simple, smaller installations, rail-less solar panel mount systems offer ease of installation with fewer adjustments needed.


5. Maintenance

Rail-Based Systems:

More Maintenance Requirements: Due to the larger number of components, rail-based systems may require more maintenance, particularly for areas with high moisture or dust, where debris can accumulate on the rails and impact performance.

Durable with Proper Maintenance: While maintenance may be more frequent, these systems are built to last with proper care.

Rail-less Systems:

Less Maintenance: With fewer components and a simpler design, rail-less systems often require less maintenance.

Clean Design: The absence of rails means there is less surface area where dirt, leaves, or debris can gather.

Which is better for maintenance?

Rail-less solar mount systems require less maintenance due to their simpler design, which is great for those looking for a low-maintenance solution.


Which PV Mount System Is Right for You?

Ultimately, the choice between rail-based and rail-less solar mounting systems comes down to your specific needs, budget, and preferences. Here’s a quick summary:

Rail-based solar panel mounting systems are better for larger, more complex installations where durability, flexibility, and stability are essential. They are ideal for areas with extreme weather and where long-term performance is a priority.

Rail-less solar panel mount systems offer a sleek, minimalist design and are perfect for smaller residential projects where cost savings, fast installation, and aesthetics are key considerations. They may not provide the same level of durability in harsh conditions but are still a solid choice for moderate climates.

At Xiamen TopFence Co., Ltd, we offer both rail-based and rail-less solar mounting systems to cater to a variety of needs. No matter the scale of your project, we’re here to help you find the best solution.